Wednesday, 29 February 2012

A Bunch of Hot Air...

Yarn Balloons....A Lot of Hot Air -Take 1
Emilee here, so I saw this and instantly fell in LOVE with this idea... 

The Original Pin

So on craft night, Wednesdays at my house, The Mr. Chips and I gathered the materials, (part of the problem with this is that unless you read THE WHOLE first blog page mentioned, you will NEVER find the tutorial link, which we didn't). So we got together the Elmer's School Glue, just the small one, yarn in various colors, balloons of varying sizes, and laid down a trash bag underneath so we didn't drip on the floor. We dipped the yarn in the glue, wrapped a TON around the balloon, and let it dry. We even sprayed the whole thing with the spray Elmer's Craft Glue (which is REALLY awesome by the way). And here is what we got...

The Pinstrosity


     Needless to say this was not quite what we were hoping for. If you read the directions, which apparently we don't at our house...in order for this to work, you cut the yarn in about three foot intervals, place it in 1:1 equal proportions glue and water, then wrap it randomly around the balloon. When we did it, we just ran the yarn through the glue, then wrapped it around the balloon, one dipped, one wrapped. This was REALLY hard to do because everything was tightly connected to another piece on the balloon and so it would move around and eventually fall off, these two balloons probably took us a good hour. The other problem is that the blog specifically says to use thin yarn. It might also help to go for smaller balloon sizes. The spray glue is awesome for other projects, but this one just weighed it down, and made the yarn white. Another pointer, this is a great outside project, very messy, very sticky...our kitchen floor never stood a chance, even with the trash bag :(

All in all a great idea, but not as simple as it seems, this one takes a bit of an artistic, and patient hand. The Mr. Chips said he would love to try this again, only modified for take two, we will let you know how it goes!


                                             -Emilee


leaps and bounds


Sweater: H&M (similar style here); Skirt: H&M (similar style here); Tights: Target; Shoes: No brand, via Ambiance in SF; Bag: c/o Asos; Hat: Lids; Sunglasses: Karen Walker; Jewelry: H&M bar necklace

Just a short and sweet post today, literally running out the door as we speak, er, type. But in case no one has wished it to you yet, have a happy leap day!

Tuesday, 28 February 2012

Saggy Scrappy Wreath

We've all seen the cute wreaths made from fabric scraps, right? Fun color combinations, reduces your scrap bag, easy to make, what's not to love? Looks easy enough (famous last words for all of us). Pinster Carolyn sent us over her scrappy wreath Pinstrosity. 

The Original Pin:

Carolyn and a cousin gathered the supplies listed on the blog and got together to make some scrappy wreaths, one for each of them and one for Carolyn's Mother-in-Law. Carolyn says, "I pulled out a wire hanger and formed it into a circle. Then I pulled out scraps of fabric and cut them into 1.5"x10" strips."  The tying began, but they soon realized things weren't quite the same. 

The Pinstrosity: 

What Went Wrong:
  •  10 inch fabric scraps are just too long for a wreath from a clothes hanger (as Carolyn noted in her email to us). 
How to Fix It:

After seeing the results from the 10" strips, the cousins decided to try 6" strips on a heart wreath, and those worked much much better (as you can see by their next wreath). 


So...here's what we learned:

  • If you're using a wreath frame that is thin (like a clothes hanger, small piping, starched yarn, etc) use shorter strips. 
  • If you're using a thicker wreath frame, use longer strips. 


Carolyn even sent us over a bonus...an additional wreath adventure they tried:
"Before either of the above wreaths were made, my mother-in-law asked me to make one for her, only she wanted it to be a horse shoe shape with a rope to hang it."

She says, "Well that failed miserably, but maybe it wouldn't have if I had used shorter strips." 


gridlock


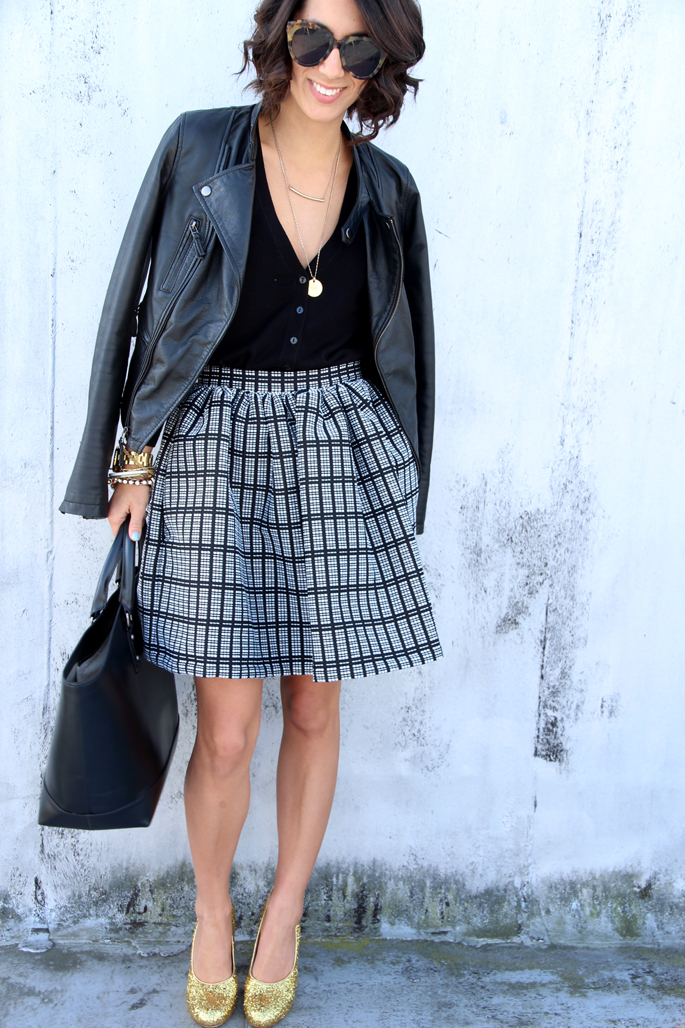
Jacket: Zara; Cardigan: Zara; Skirt: Topshop; Shoes: Miu Miu; Bag: Zara; Sunglasses: Karen Walker; Jewelry: H&M bar necklace, Emerson Made medallion necklace, Michael Kors watch, assorted gifted bangles, Asos spike bracelet

After hunting for this skirt in the Topshop flagship store in NYC a few weeks ago, I finally broke down and snatched it online. The grid pattern and exaggerated full shape had me at hello.

On a side note: Have you entered my Breil watch giveaway yet? 

Monday, 27 February 2012

Not So Grilled Cheese

Hello All! This is the first post by Emilee, and well it's not actually mine! This one was The Mr. Chip's disaster project. Ahem. Here Goes!
The Original Pin
Awesome right! Who knew?! Grilled Cheese, easy on the Grilled.

The Pinstrosity

What Went Wrong
 A few things went wrong here:
If you read the directions, instead of just going off of the picture, it would have told you that this "trick" doesn't work on ALL toasters, however, it then goes on to say that this only works on a toaster without a "Toast Cage", AND (here's where they get ya') if the cheese does NOT melt off the side. So in all reality this only works if there is in fact no cheese involved at all, lame right?!  Because really what is a Grilled Cheese without melty cheese?!
In Chip's experiMELT he turned the toaster over, put in the cheese and bread, just as the pictures shows, and well...our toaster caught on fire. So this project is a bust.
How to Fix This

Go to your local Wally World, and buy a Toaster Oven!
...and well another option is to carefully place your cheese on the bread, and make sure you REALLY watch it, because the cheese can get out of hand really quickly. Another thing to consider is that toasters were not meant to be on their sides, so the heat has no where to go if it can't vent up, causing to much heat, and then fire. Overall this "trick" was a bust and safety hazard, so if I were you I would stick with traditional toast, or traditional Grilled cheese, on a grill, the way they were meant to be. Happy Toasting!

                                             -Emilee

monday giveaway: breil watches


I don't know about you, but I could certainly use a Monday pick-me-up right about now. And what better way to kick off the week than with a watch giveaway from the lovely folks over at Breil!? You all saw how I styled up my own white and rose gold Breil watch on Friday and without further ado, here's how you can snag your own!

2.) Leave a comment below describing how you would style your own Breil watch. 
3.) Check back on Tuesday March 6, when I'll be selecting a winner!

And the fine print: In order to win, you must be able to provide a US or Canada shipping address. Only one entry per person please. (But if you scoot on over to Meghan's and Rebecca's blogs right now, you can enter to win their watches as well!)

Good luck everyone and here's to a productive week!   

scarf print


Shirt: Zara (similar style here); Pants: Zara (similar style here); Shoes: Zara (similar style here); Bag: Gifted vintage clutch; Sunglasses: Karen Walker; Jewelry: H&M necklaces, Michael Kors watch, assorted gifted bangles

Sunday, 26 February 2012

working for the weekend

Jacket: Zara; Dress: Cynthia Rowley (love this version though); Boots: Zara (similar style here); Bag: Zara (similar style here); Sunglasses: Elizabeth & James; Jewelry: Michael Kors watch, assorted gifted bangles

Just a quick "weekend" hello! Hope you're enjoying a relaxing Sunday!

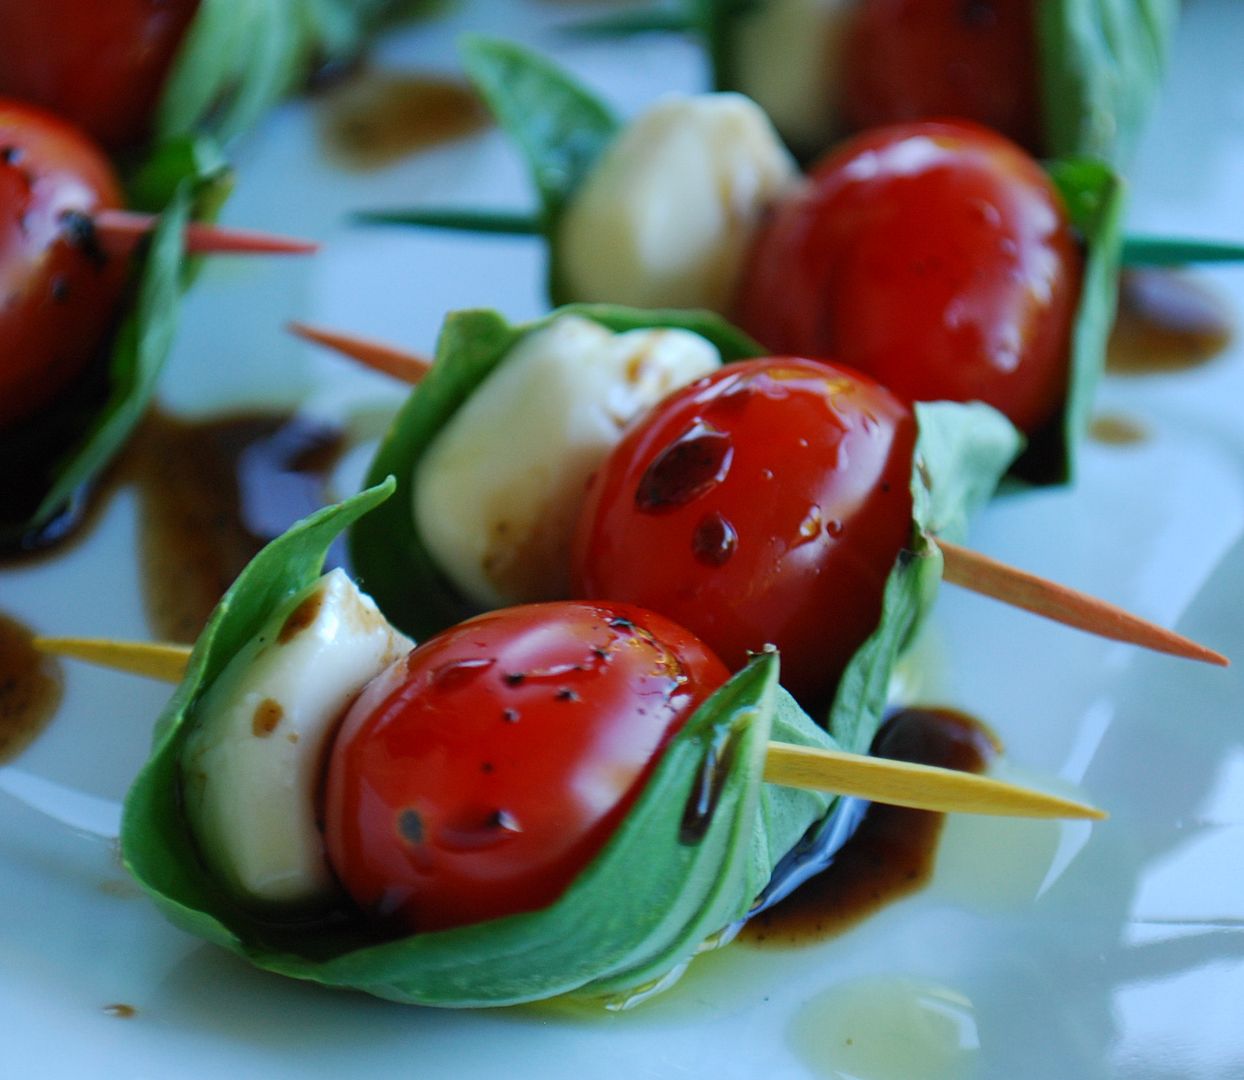
Caprese Salad Skewers

We finally had our first pinstrosity emailed to us! 

Pinterest Pal (what are Pinterest users called? Pinsters?) Diedre sent over her Pinstrosity, Caprese Salad Skewers. 
The Original Pin
http://terristable.blogspot.com/2010/06/apps-and-im-not-talkin-iphone.html 
The Pinstrosity
http://mowercooking.blogspot.com/2012/02/caprese-salad-skewers.html 

What Went Wrong:
Diedre says, "It wasn't a disaster, but could've used some improvements."

  • They were too big to eat all in one bite
  • The whole basil leaf was too overpowering. 
  • The texture. 
    • She says "I found the texture of the fresh mozzarella to be too slimy for my liking, but I tend to be overly sensitive to textures, so that may have just been me."

How to Fix This:
Diedre went the extra mile and looked up an idea on what could be done to improve on this. She suggests doing something like this instead:
http://www.myrecipes.com/recipe/mini-caprese-bites-10000001731442/
"I think this idea would've been better. You could use a stick of string cheese to get a firmer cheese texture, and the shredded basil would be much less overpowering. And you could fit it all into one bite."


Friday, 24 February 2012

Dish Mop on Steroids

I've had my eye on this project for a while. I'm just a beginner crocheter, and this looked a little intimidating, but I finally decided today was the day. Look how cute this dish mop is!

The Original Pin


The crocheting instructions were easy, and it came together quickly. All went well at first...until I realized this was taking on Great Hulk proportions. Yet, I continued on and finished it, wondering why mine was different.

Well...this is mine. Not so cute.


What went wrong? 
I didn't read the directions close. Had I done so, I would have gathered the right supplies. The directions are very well written, I just failed to read them completely.   
  • I used size 4 yarn, not 3. 
  • I just grabbed one of my crochet hooks, not checking to make sure I had the right size. I used a 5mm instead of a 2.5mm. 
    By the time I got to row 4, I knew this was already way too big. So I skipped rows 5 and 6. I can't imagine how over-sized this would be had I done all the rows in the pattern. 

    How to fix this:
    • Read the directions and use the suggested materials. 
    • A smaller hook with the same size of yarn would have made it smaller, but not as small as the pattern makes. 
    There's not much I can do to the dish mop I just made to fix it. So now I've got a Crocheted Ruffled Dust Mop.

    I'll try this project again when I have the right yarn and hook and see if I can't get a cute dish mop out of it.

    style challenge: breil watches


    Sweater: Topshop; Shirt: Equipment; Pants: Club Monaco (similar style here); Shoes: Isabel Marant; Sunglasses: Karen Walker;  Jewelry: Breil watch c/o; assorted gifted bangles, Asos spike bracelet

    Ever since I stumbled upon this gem of a blog (hint: Taylor Tomasi Hill overload!) I can't stop myself from trying to recreate some of her signature looks. (I have this photo to thank for the outfit above.) Of course, my accessory supply is quite dismal in comparison to hers but I recently received this crisp white and rose gold watch from Breil that helped breathe some much needed life into my arm candy collection. 

    And since we're long overdue for a style challenge around these parts, check out how my dear friends Meghan and Rebecca styled their Breil watches. Who knows, if you like what you see, you might even be able to win our watches! Interested? I know you are! Be sure to tune in on Monday for more details. 

    Until then, happy weekend everyone!

    Thursday, 23 February 2012

    Healthy Ice Cream?

    I was looking for sugar free desserts the other day and came across a recipe for yogurt, honey, cinnamon ice cream. I pinned that faster than...something really fast. I LOVE cinnamon. I love honey. I love ice cream. A combination of the three? Yes please. This sounded heavenly.

    The Original Pin

    You'd think with three ingredients, this would be pretty fail proof. 

    What Went Wrong:
    • Our gel canister ice cream maker was way too cold and the yogurt concoction froze solidly to the sides almost instantly, so the paddle couldn't turn. 
    • With the sides of the ice cream maker coated in a solid layer of overly frozen yogurt, the yogurt in the middle just got cold...it didn't freeze much at all. 
    • I wanted ice cream and this definitely was not ice cream. It was good yogurt, but it didn't even come close to ice cream for me.
    This is 20 minutes after scooping out the soft yogurt...it's still frozen solid. I could mortar a house with this stuff! You can't use metal on these gel canisters...and as you can see, a wooden spoon just doesn't cut it.

    How to fix this:
    • Let the ice cream maker thaw out some before I try and freeze yogurt
    • Try the alternative method given in the blog of freezing in in popsicle form. 
    • Try different flavors in the yogurt...maybe I can make it less yogurty and more desserty.
      • Vanilla and caramel flavorings
      • Throw in some fresh fruit (ooh...berries!)
      • If you still want to make it healthy and sugar free but don't want the honey taste, try using Truvia or some other natural sweetener. We like Truvia at our house.
    • Buy ice cream if it's ice cream you're wanting. 


    Do note, that this isn't a bad recipe at all for regular yogurt when yogurt is desired. I'm going to make it again, just not when I'm craving ice cream.  


      Newly commissioned piece!

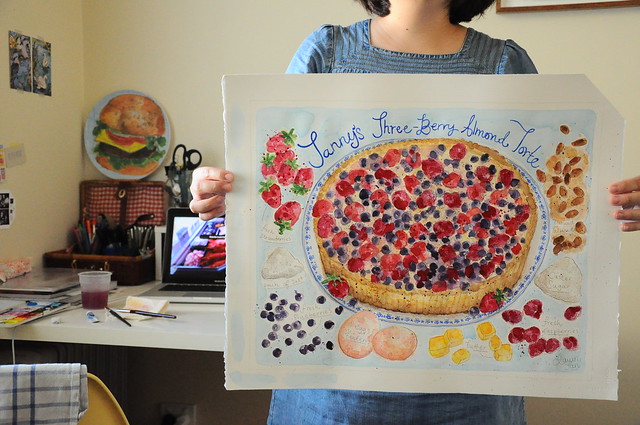
      Newly completed commissioned piece!Finally, after what seemed like ten thousand strawberries, blueberries and raspberries... I have finally completed yet another commissioned piece! The picture above was taken last evening, RIGHT after I finished it. As you can tell, I didn't even bother cutting off the edges yet! I was too excited! Haha. I think apart from the british packaging piece I did last year, this has got to be my other favourite! Hours and hours of drawing and painting while watching re-runs of My Kitchen Rules, along with missed episodes of Greys Anatomy and Gossip Girl. Ah. Nice times! I really, truly do enjoy just sitting alone at my desk, drawing and painting the whole afternoon away.

      School starts again for me next week. I'm going back to Uni again to do a graduate diploma in secondary teaching. I'm a little anxious and I really hope I'll be able to get this whole art making + schooling + placements thingy well-balanced. So I can enjoy teaching, essay writing (oh bless me!) and art making all at the same time! Let's see if it'll work! I'm keeping my fingers and toes crossed!

      And yes, don't forget! There's a 20% off all art prints Sale going on right now in my shop! Do check it out while prints last! I'm headed to my trusty printer's in just a bit. Going to check out the latest test prints... MMMMM!

      day-glo


      Jacket: Old Navy vest worn with a Forever21 leather jacket; Shirt: Equipment; Skirt: Zara; Shoes: All Saints; Bag: Cambridge Satchel Company; Sunglasses: Karen Walker

      Reorganized the closet recently and was happily reunited with this skirt (it was hiding in the very back). Don't you just hate it when good skirts go missing like that?! 

      Wednesday, 22 February 2012

      sonoma


      Dress: Topshop; Jacket: Zara (similar style here); Shoes: Zara; Bag: Zara; Sunglasses: YSL; Jewelry: Michael Kors watch, assorted gifted bangles

      Many thanks for all the birthday wishes this past Sunday! In all honesty, I couldn't have asked for a better day -- went wine tasting out in Sonoma with the man friend (where we were greeted with plenty of sunshine) followed by a delicious dinner at The Girl and the Fig (also in Sonoma). When it really boils down to it, just give me some good wine, cheese and a California sunset and I'm a happy girl. 

      How was your weekend? Any adventures you'd like to share? 

      Tuesday, 21 February 2012

      20% OFF ALL ART PRINTS!

      Work in progress
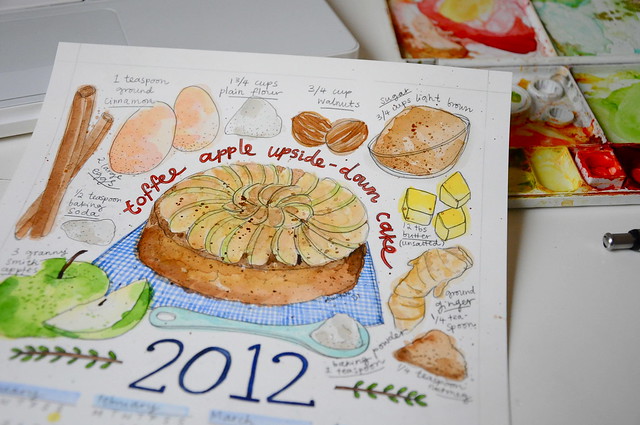
      From now till perhaps Mid-March, I'll be having a mini sale! 20% off all Art prints from my shop! And yup, it does include my latest fruit and veggie prints too. Both of which are really limited. Only 20 each for the A3 sizes. And 10 each for the much larger 50x70cm pieces. So click away and buy yourself a print if you wish! Or you can help spread the word too if you feel like it.

      Use discount code 'HOOOORAY' upon checkout! Thank you : )

      doublemint


      Sweater: H&M (similar style here); Jeans: BDG via Urban Outfitters (similar style here); Shoes: J. Crew (similar style here); Clutch: c/o Rachel Roy; Sunglasses: Karen Walker; Jewelry: "Krystal" nameplate necklace via Mynamenecklace.com; Emerson Made medallion necklace, Michael Kors watch, assorted gifted bracelets

      After spotting a ton of monochromatic looks out in New York just last week -- I'm doubling up on a lot of my go-to colors, mint green being among the first. Considering this look really is just a comfy knit sweater and kick-around jeans (that I threw on for a quick sunset walk through Golden Gate Park), I rather like how whimsical it came out -- whimsical with a dash of cheeky. 

      Up next? I think a pale pink combo might have to make an appearance soon. Stay tuned!  

      Monday, 20 February 2012

      Live Updates

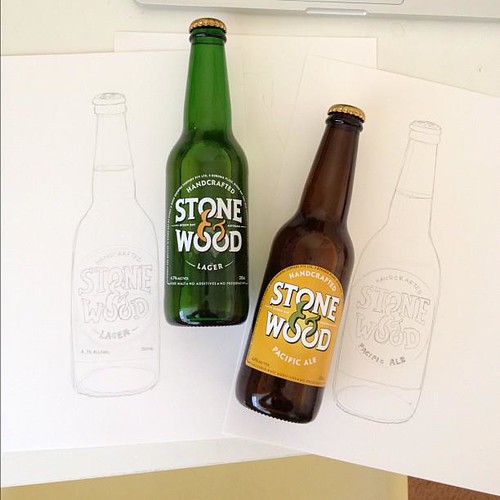
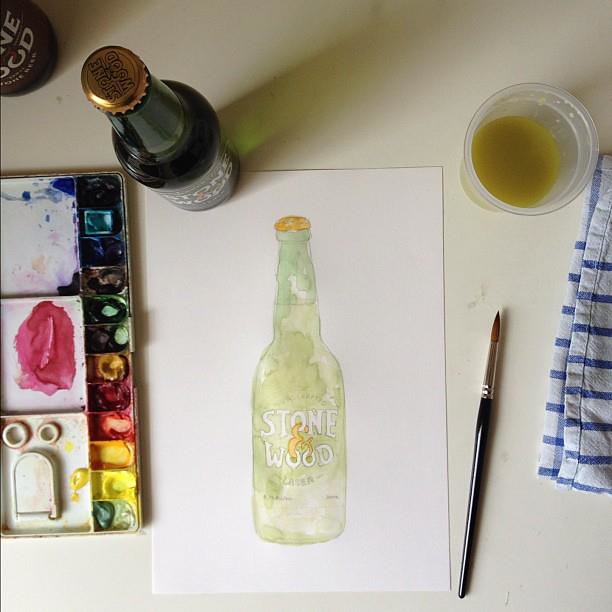
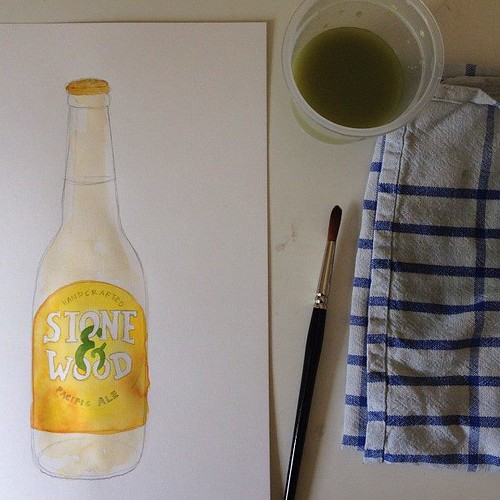
      In progressIn progressIn progressIn progressIn progressIn progress
      It's official! I am hooked onto Instagram! It's so bad how I no longer really use my proper camera anymore. Oops. Blame all the bad backaches and neckaches from carrying it around all the time. I still love shooting with it though and am pretty sure I'll be bringing it around more often. Soon! But well, for now, I'm kind of having a little 'honeymoon period' with instagram. I find it handy for uploading pictures of my work in progress and always do so. In fact I often find myself doing mini live updates so others can see the progress  and perhaps learn a trick or two of how to paint?  Feel free to follow me if you want to.
      My username is handmadelove.

      For those of you who don't have an iPhone or instagram, you can always view my pictures here. I know a few of you have tried adding me as a friend on Facebook. Thank you for wanting to be friends with me! I truly think it's really thoughtful. But for now, my facebook's pretty much for family and good friends only. So if you'd like to like my Facebook page instead, that'll be awesome. Thank you!

      I've also recently lost all my contacts from my old mailing list. So if you'd like to be updated (once in a blue moon I promise!) with shop updates, giveaways, exciting bits, class schedules do sign up here. I must admit though, I almost never send anything out. I try and post everything up here on the blog. So yup, fret not. No weekly or fortnightly spam mails, I promise!

      Well, before I head off to do more painting, I'd like to let you all know that come early March, there'll be a big giveaway on my blog/twitter and Facebook! Prize pack will include this new print in A3, several A4 prints and some past prints and things of mine from over 2 years ago..things like my zines! Hahaha. Stay tuned for the giveaway!